This is an easy run through tutorial of how to create a SQL Server Integration Services (SSIS) package to export a file. We are going to connect the database and use a query to populate a file. The file will be a standard CSV file.
If you have Visual Studio installed, then you almost have everything you need. You must also have SQL Server Data Tools installed along with Visual Studio. Then, you are ready to create SSIS packages.
Previously, we got the following data into our database in Create an SSIS Package to Import a File. Before we begin, you may want to run through that tutorial to see how it is done and get the TEST table created. The following is in the test table:
| A | B | C |
| 1 | 2 | 3 |
| 4 | 5 | 6 |
Alternatively, just create the table:
CREATE TABLE TEST (A INT, B INT, C INT);
INSERT INTO TEST VALUES
(1,2,3),
(4,5,6);
So now, on to creating the package.
-
- Create the Solution.
- Open Visual Studio. Create a new Project: FILE > New > Project…
The project type you want can be found under Templates > Business Intelligence: Integration Services Project.
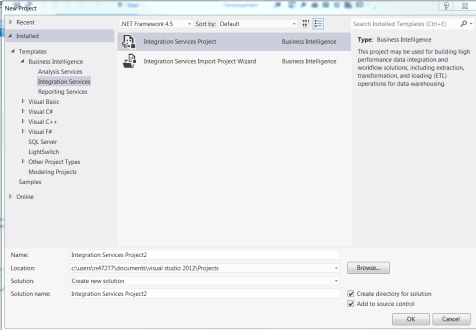
- Give the package a name and a place to live. If you have Team Foundation Services or some kind of source control, check off “Add to Source Control.” Then click OK.
- Open Visual Studio. Create a new Project: FILE > New > Project…
- Create the Database Connection. There is a section below the “main stage” called “Connection Managers.” This is where you will create the link to the database for this package.
Remember: the link will only work for this package, should you add more packages to the solution you just created.
- Right-click in the Connection Manager section.
- Select New OLE DB Connection. Click New… on the dialog box.
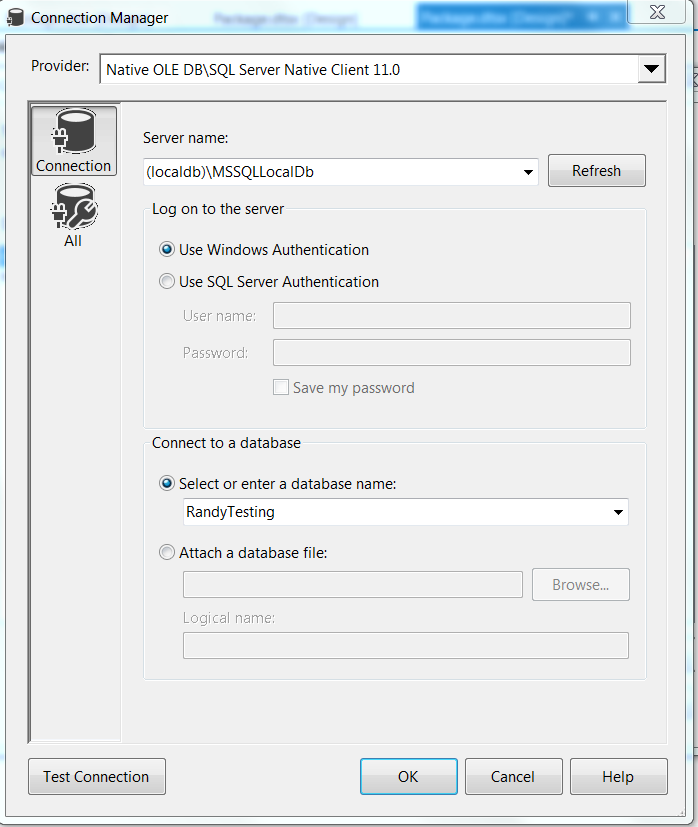
- On the next screen, we will add the name of the SQL Server database and database to connect to.
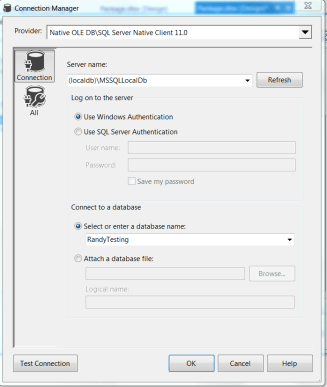
- Enter the name of the SQL Server on the Server Name. Try not to use the dropdown because it will try to gather every SQL Server on your network.
- Once that is entered, the “Connect to a database” portion will become active. Select a database name. It is okay to use the dropdown here.
- Click OK
- Add a Data Flow Task. This sets the stage for adding tasks that will import the data into the database. Just drag it over onto the stage.
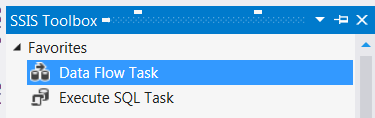

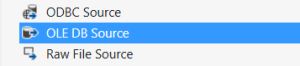
- Add the Database Source. Double click the Data Flow Task or click the Data Flow tab. When you move to the Data Flow tab, the tools in the toolbox change to the tools needed, such as Sources and Destinations. OLE DB Source is the most common connection to use for SQL Server.
- Drag the OLE DB Source onto the Data Flow stage. It will have a red X on it.
- Double click the OLE DB Source. The OLE DB Source Editor appears. It will automatically select the only OLE DB Connection Manager available, the one you made on step 2.
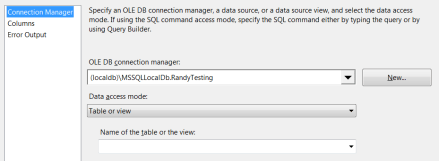
- Select the TEST table in “Name of the table or the view.”
- Click Columns in the left sidebar. It will display the columns found in the table selected. This must be done to load the metadata into the task, and it will be used throughout this Data Flow.
- Drag the OLE DB Source onto the Data Flow stage. It will have a red X on it.
- We will now create the second connection for the package: the connection to the file.
- Right-click in the Connection Manager section.
- Select New Flatfile Connection.
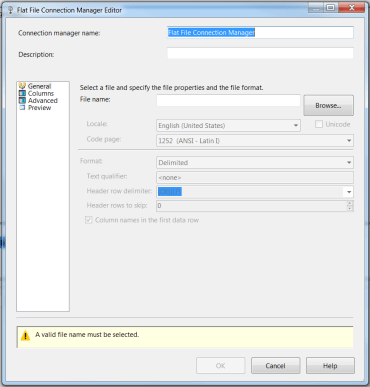
- File Name: Browse to your source file. When the file is selected, you can select text qualifiers, etc. but in this example, all of the defaults are correct.
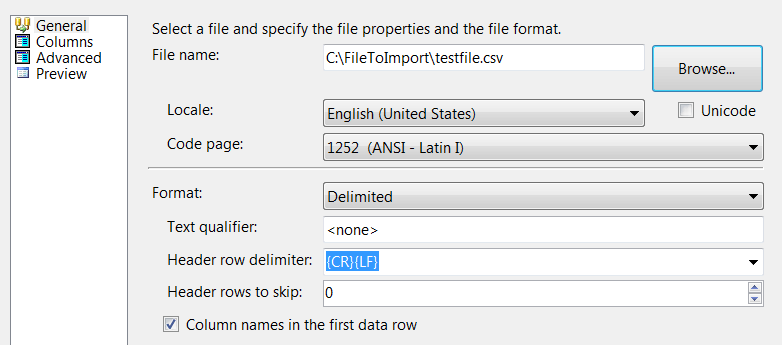
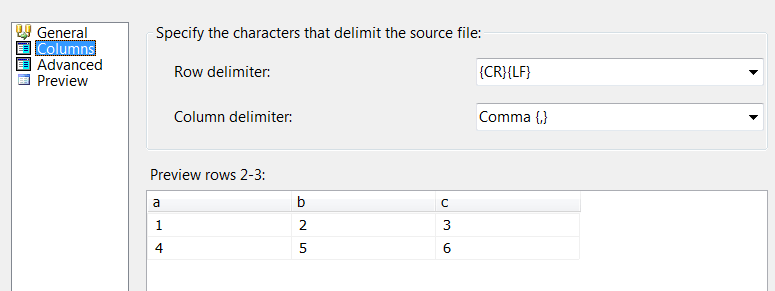
- Once the filename has been selected, click on “Columns” on the left sidebar. Clicking columns will have the connection manager automatically needs about the column names and data types. Click OK.
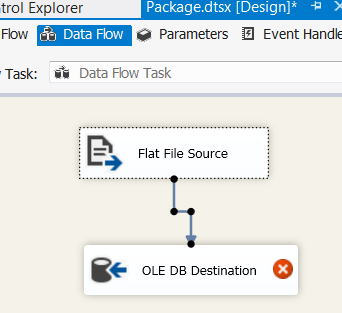
- Connect the Source and Destination. Double click the Data Flow Task or click the Data Flow tab. When you move to the Data Flow tab, the tools in the toolbox change to the tools needed, such as Sources and Destinations.
- Drag a Flat File Source task onto the stage. It will have a red X on it.
- Double click the Flat File Source. It will automatically select the only Flat File Connection Manager available, the one you made on step 3.
- Click on Columns in the left sidebar. As before, it will automatically grab the information it needs, this time from the Flat File Connection Manager.
- Drag a Database Destination onto the stage. It will have a red X on it.

- Connect the two tasks by dragging the line from Flat File Source to the OLE DB Connection. The line actually contains information on the meta data, so now the OLE DB Destination knows what the fields and data types are going to be moving into the database.
- Next to the “Name of the table or view”, click New… to create a new table. The script will automatically be created for you that will work for the data you are importing. You have the ability to change the script at this time, such as the name of the table. By default, it is creating a table called [OLE DB Destination]. Change the table name to TEST, then click OK.
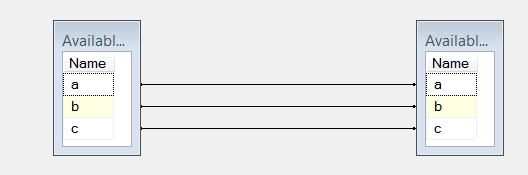
- Click Mappings on the left sidebar and the mappings from the Flat File Source to the OLE DB Destination will be created automatically. Then, click OK.
- Drag a Flat File Source task onto the stage. It will have a red X on it.
-
CREATE TABLE TEST ( [a] varchar(50), [b] varchar(50), [c] varchar(50) )- Believe it or not, we’re ready to run our import package! It was that easy. Of course, we made it that easy, but… whatever, it’s just a simple tutorial. 🙂
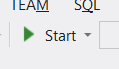
To run, click the green play button on top labeled “Start”.
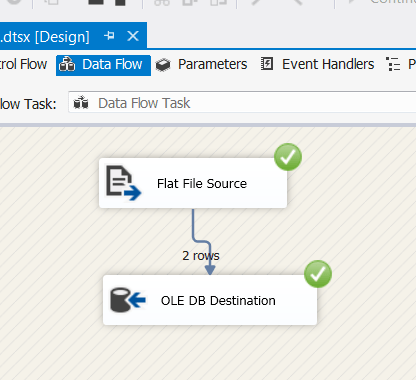
- This is what success looks like: Green Checks!

- Believe it or not, we’re ready to run our import package! It was that easy. Of course, we made it that easy, but… whatever, it’s just a simple tutorial. 🙂
- Create the Solution.